+91-9897841990, +56 9 6307 9211
+56963079211 ,
+523315000806
Curso En
ESPAÑOL
Cours En
FRANÇAIS
+91-9897841990, +56 9 6307 9211
Curso En
ESPAÑOL
Cours En
FRANÇAIS
+56963079211 ,
+523315000806
x
Home
About Us
Gallery
Team
FAQ
Yoga Teacher Trainings
200 HOUR YOGA TTC IN RISHIKESH INDIA (Traditional Hatha and Hatha Vinyasa)
300 Hour Yoga Teacher Training Certification Course in Rishikesh, India
Curso de 200 horas para profesor de Hatha Vinyasa Yoga en Rishikesh
Formación Profesores de Yoga – 300 hrs. India – En Español
Formation de professeur de yoga de 200 heures à Rishikesh(Online)
Online Traditional Hatha & Hatha-Vinyasa Yoga Teacher Training
Yoga Retreat & Workshop
10 Day Shamanic Retreat in Rishikesh, India – October 2022
7-Day Yoga for Trauma and Healing Retreat in India
Online Mantra Sadhana Workshops
Sthira Tandava 07 Days Retreat in Rishikesh, India
Fee and Schedules
Payment
Blog
Contact Us
Home
All Blogs
Dhanurasana(Bow Pose) Steps & Benefits
by Uttam Ghosh
https://www.rishikeshyogisyogshala.org/dhanurasana/
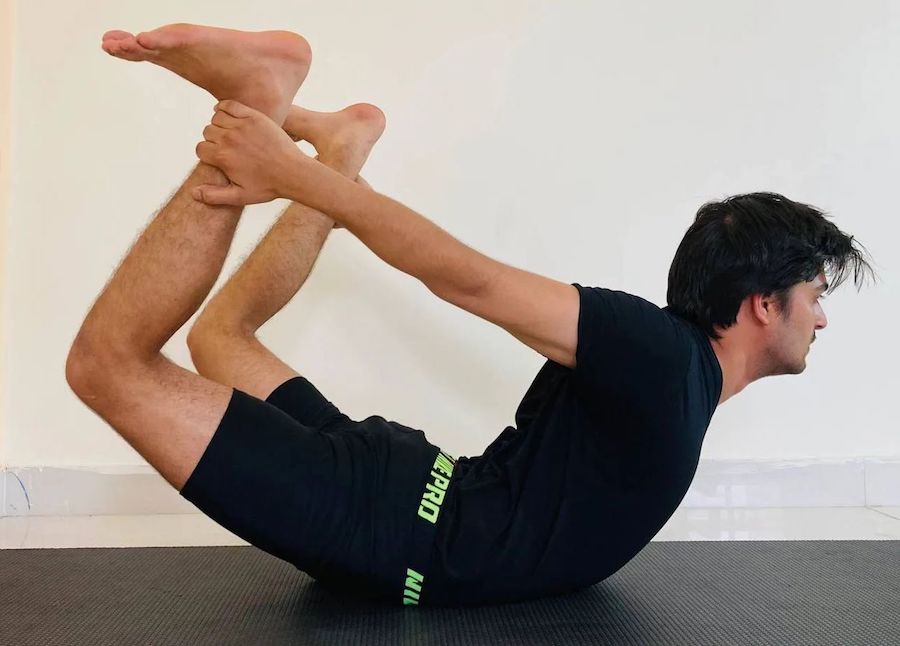
The name Dhanurasana refers to the bow-like shape that the body assumes when practicing it. Bows are
called dhanu in Sanskrit which is why it is called the Bow Pose in English. Your arms mimic the string of the bow, while your chest and legs represent the bow’s body. In this pose, you lie on your stomach, pull up your torso and legs, and hold the feet with your hands. Ding this deeply bends your back while opening your chest and strengthens your arms and shoulders as you hold your feet with your arms. Through this movement, you can increase your spine’s flexibility and strength in your arms, legs, and back. In addition to strengthening your back, this heart-opening backbend stretches your hamstrings and hip flexors. Expanding your chest and shoulders enhances your posture by making up for the time you spend slumped over a computer. It also serves as a warm-up position for many challenging and advanced backbend practices. Let us have a look at the steps to perform the pose and its benefits. How to Do Dhanurasana(Steps) Lie down on your stomach keeping your forehead on the ground and arms beside your body. Spread your legs hip-width apart Bend your knees to bring your feet as close to your buttocks as possible. Your toes should be pointed towards you. Stretch your arms backward to grab your ankles. Pull up your head and chest so that your arms can be taken towards your feet. Pull your legs towards you and upwards while further lifting your torso. Keep your gaze in the front to align your head properly. Lengthen your tailbone so that your spine remains flexible and easy to bend. If you feel comfortable, you can keep pulling your legs up to deepen the stretch. Stay in this pose for at least 3-5 breaths and gently release your legs and torso towards the ground. Beginners’ Tips Do not force yourself to stretch your legs for achieving the final pose. If you are only able to lift only your head and chest, keep it that way and gradually increase the lift. You can use a strap if your hands are unable to hold the ankle shoulders or your knees are stiff. Loop the strap around the ankles and hold the ends with both hands to bridge the gap. To give extra cushion to your pelvis and abdomen, place a folded blanket before your lie down to practice. Make sure your head is kept in a natural position rather than tilting it back or hanging it. There is a tendency for the body to automatically hold its breath. Make sure you have a continuous flow of breath for as long as you are performing this pose. Contraindication Patients suffering from hernia, appendicitis, and severe sciatica should not perform this pose. If you suffer from Spondylitis, insomnia, migraine, or headache, you should proceed with extreme caution or avoid practicing this pose altogether. If you have any heart condition and suffer from high or low blood pressure, it is better to avoid practicing this pose or consult your teacher and doctor beforehand. People who have a recent injury or have undergone surgery on the lower back, core, thighs, knees, and shoulders should avoid this asana. Do not perform this pose if you are pregnant or menstruating. Benefits of Dhanurasana Practicing dhanurasana can be beneficial to people who want to get rid of lower back pain. It massages your abdominal organs which improves their functions. Women can especially benefit from it by reducing their menstrual pain. This pose is great to open your chest while strengthening and toning the arm and leg muscles. Below are some of the benefits of this pose. Stretches and strengthens the spine and back muscles Improves the range of motion and flexibility of the knees and shoulders Stretches the thigh muscles, especially the quadriceps Improves posture and balance Tones the arms and leg muscles Opens and expands the chest improving lung capacity Improves the metabolic and digestive functions Enhances the functions of kidneys, liver, and other abdominal organs Aid in alleviating menstrual and reproductive disorders Reduces the fat around the tummy by burning calories Can cure lower back pain Fights off weariness, stress, and anxiety Gives you more energy, focus, and stamina.
Read More...
Read Less...
Gomukhasana (Cow Face Pose)
by Rishikesh Yogis
https://www.rishikeshyogisyogshala.org/gomukhasana/
Gomukhasana (Cow Face Pose) is a seated pose used for exercise, it is widely used for pranayama as
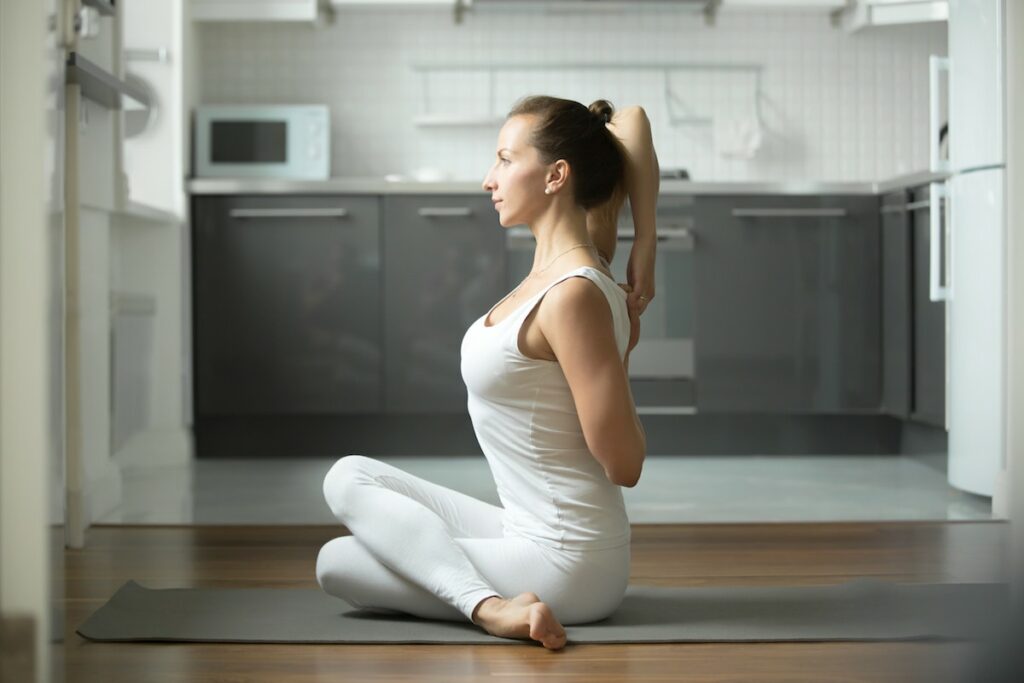
well as meditation. It is one of the 15 significant asanas described in the yoga text, Hatha Yoga Pradipika. Cow Face Pose is an excellent hip opener and as the hips are known as the storage depot for stress, anxiety and fear. So practising this pose helps to release the negative emotions and recharge your body with positive energy. (adsbygoogle = window.adsbygoogle || []).push({}); What To Know About The Gomukhasana? Gomukhasana is a term originating from Sanskrit word Go means 'cow', Mukha means 'face' and Asana means 'pose'. It is named so because the shape of knees in this pose looks like the lips of a cow, feet as horns of a cow and arms resemble the ears of a cow. This pose inspires us to maintain the generosity and calmness of a cow. Gomukhasana is a traditional yoga posture as it is mentioned in detail in the 4th-century text, Darshana Upanishad. Sanskrit: गोमुखासन ; Gomukhāsana Pronunciation: go-moo-KAHS-nah Translation: Gomukha = cow face, asana = pose Category: Seated/ Sitting Level: Beginner to Intermediate Duration: 30 seconds-1 minute Stretches: Shoulders, Armpits & Triceps, Hips, Thighs, Thorax Doshas: Kapha, Pitta Elements: Earth, Water How to Come Into The Gomukhasana? Step 1 Sit in Dandasana (Staff Pose) with your back straight and legs outstretched. Bend your left knees and place your left foot to the outside of the right hip. Now fold your right leg and rest it over the left thigh. Make sure your knees are close to each other and stacked above another. Your heels should lie equidistant from the sitting bones. If you can't sit evenly on your sitting bones then try the modified pose. Step 2 Inhale and roll your right shoulder back & down. Then fold your right arm and place it behind your torso with your hand between your scapulae. Now roll your left shoulder back and slowly raise your left arm over and slowly stretch it behind and try to reach your right hand between the shoulder blades. If you are not able to catch the fingers of your backhand, then you can use a modification of this pose. Step 3 Your left elbow pointing towards the ceiling and scapulae firmly pressed against your back. Keep your spine erect, expand your chest, lift your sternum and lightly lean your body back. Step 4 Hold the pose for half to 1 minute. Slowly release your arms and your legs. Relax and then repeat the pose on the other side. Keep in mind that the leg which is on top, the same side arm should be placed in a lower position. Modifications Of Gomukhasana For those with tight shoulders, it will be difficult to clasp their fingers. So they can hold a yoga strap or belt between the hands. Slowly they can bring their hands closer while holding the strap. If your sitting bones are not evenly resting on the floor and you are feeling discomfort in your hips and knees. Then you can keep a soft block or bolster to lift your sitting bones off the mat & support them evenly. Variations Of Gomukhasana To go beyond the pose, you can lean forward and rest the front torso down on the top of your thigh. You can stay in this posture for 20 to 30 seconds. You can even try Vajra Gomukhasana, where your legs are in Vajrasana and your upper body and arms are in Gomukhasana. Another option here is to choose Mahavajra Gomukhasana. In Hasta Gomukhasana, you sit in Gomukhasana and your arms instead of behind your back will be raised above your shoulders. Your arms are crossing each other and your elbow pointing to the ceiling. Benefits Of Gomukhasana Improves the Body Posture: Regular practice of Gomukhasana works wonders for those who have stiffness in shoulders. It aids in releasing the tightness from shoulders and making it more flexible. It also flexes the spine and releases the pain of the cervical spine. By stimulating the spine, shoulders and chest muscle, it gradually improves the natural posture of the body. To know more about simple yoga poses for back pain management please read- Yoga Poses for Lower back and Tailbone Pain(Opens in a new browser tab) Tones the Body: This yogic posture gives a good stretching to your chest, shoulders, triceps, hips, thighs and more. So basically this one asana helps you to tone the major muscle parts of the body. Relieves Stress And Anxiety: As in this pose, our chest and heart are open so it improves the flow of oxygen and blood. Hence, it relaxes our physical, mental body. Practising the Cow Pose helps to get rid of stress and anxiety. Cures sciatica infection: Sciatica occurs when the herniated material from a ruptured spinal disc press upon the delicate nerve root emerging from the spinal cord, this causes radiating pain in the lower back, thigh, and calves. Practising Cow Face Pose regularly can help in curing sciatica pain. Stimulates Kidney: This yogic pose has shown positive effects on kidney simulation which lead to kidneys better functioning and is found to be helpful for diabetes patients. By enhancing the working of the kidneys, thereby helps in treating diabetes. It also activates the bladder and the digestive system. Activates the Chakras: As this excellent yogic posture offers a deep hip abductor stretch which results in more relaxed hip muscles. It also works on opening the hips and making the pericardium area more accessible. This pose also improves the flow of blood flow which release the stiffness from the lower body and relieving stress. Hence it allows the flow of Prana from the unblocked chakras and activates the Muladhara, Svadhisthana and Anahata chakras. Contraindications & Cautions Of Gomukhasana (Cow Face Pose) pose If you are having severe pain in the neck or shoulder, refrain from this pose. If you have just mild pain, then perform the asana under the supervision of an experienced yoga instructor. It is advisable not to do this pose in case of bleeding piles and spondylitis too. This pose should be avoided if you have the injury in muscles, ligaments, and tendons or muscle tear or pain in thighs. Preparatory Poses Of Gomukhasana Virasana (Hero Pose) Bhadrasana (Gracious Pose) Supta Padangusthasana (Reclining Hand-To-Big-Toe Pose) Follow-Up Poses Of Gomukhasana Garudasana (Eagle Pose) Ardha Matsyendrasana (Half Fish Pose) Marichyasana III (One-Legged Seated Spinal Twist Pose) Bharadvajasana (Bharadvaja's Twist Pose)
Read More...
Read Less...
Setu Bandhasana Pose Steps and Benefits
by Rishikesh Yogis
https://www.rishikeshyogisyogshala.org/setu-bandhasana-pose-steps-and-benefits/
Setu Bandhasana is a pose in which the body is inversely bent in a U- position or bridge position.
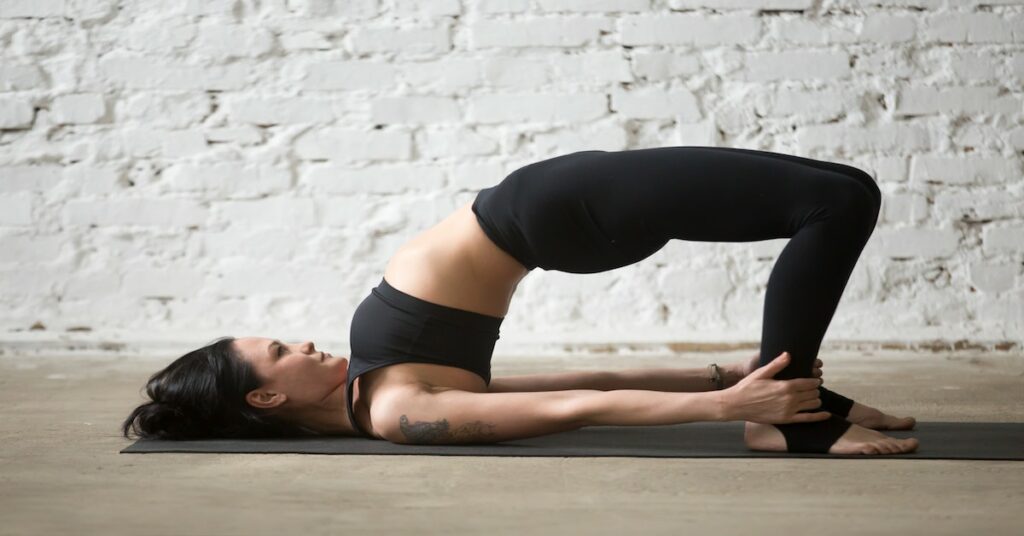
There are many benefits of Setu Bandhasana. In this article we will discuss the steps to perform this pose and its benefits. Setu is a Sanskrit word meaning ‘bridge’ and Bandha meaning ‘bind’. Setu bandhasana should only be practiced with empty bowel and stomach and therefore preferred in the mornings. You can also practice it in the evening, just make sure you have had your food 5-6 hours earlier. (adsbygoogle = window.adsbygoogle || []).push({}); The science behind the Setu Bandhasana (Bridge Pose) In this asana or pose your heart, chest, and shoulders get a really good stretch along with your neck and lower abdomen and thighs. In this asana, as you lift your torso, your heart is placed above your mind, which is considered to be a good inversion. It gives you various benefits, especially targeting your psychological health while relieving your anxiety, stress, headaches and helping with your depression. While performing this pose, your chest opens up which provides a great advantage for people with asthma. It is a great asana for people who spend a major chunk of their day in front of the computers. Step- by- step Guide Setu Bandhasana Lie down flat on your back on a hard surface, preferably on a mat. Bend your knees and make sure to place your legs hip-width apart. Put your hands beside you with the palm facing downwards. Putting the pressure on the floor through your hands, lift your back. Lift such that your chin is touching your chest, without any movement or effort. Inhale and lift your torso is little up. Make sure your knees and ankles are aligned in a straight line. Your thighs should be parallel to the floor. Hold on to your breath for a few seconds and release. Repeat the process a few times. Tips for Beginners While trying out the pose for setu bandha, make sure you don’t stretch your roll your the top of your shoulders out or away from your ears as it may overstretch your neck causing soreness. Also, make sure your buttocks are firm while you are in the bridge pose. When you are not putting your conscious towards the pose, the point of doing this asana might be pointless as there will be no stretch in the lower back or back. Setu Bandhasana( Bridge Pose) Benefits Helps in improving your digestion. Calms down your brain, reducing anxiety and stress. Strengthens your back muscles. Helps in pumping more air to your lungs and improves the overall performance of the body. Helpful in high blood pressure and asthma. Stretches your neck, back, and legs. It helps in soothing the symptoms of menopause. Setu Bandhasana Precautions Make sure to practice this pose on an empty stomach for efficient results. Avoid practicing this asana in a back injury. Don’t over roll or stretch away from your shoulders from your ears to avoid neck soreness or sprain. Do not turn your head right or left when you are in the pose. Be careful while practicing this asana if you are suffering from knee pain. Try to practice this asana under some professional guidance when performing for the first time. Contraindications of Setu Bandhasana Do not practice this asana if you have a neck injury. People with severe migraines should avoid this pose. People with a weak stomach or intestine should avoid this pose as maximum pressure is put on the internal organs. Conclusion In all, Setu Bandhasana can be practiced by everyone by making sure there is professional guidance in the initial stages. Bridge pose is an easy intervention for the body but you have to be careful to make sure you don’t get a sprain in your neck. If you are trying this at your home make sure to check out different videos and articles just to add up to your information while practicing the setu bandhasana. Plenty of information can be found out there regarding this topic. Also, it is a feasible option for a healthy lifestyle as this can be done in the comfort of your home and provides various benefits for your mind and body. (adsbygoogle = window.adsbygoogle || []).push({});
Read More...
Read Less...
Benefits of Samakonasana or Right Angle Pose
by Rishikesh Yogis
https://www.rishikeshyogisyogshala.org/samakonasana-or-straight-angle-pose/
There are many benefits of Samakonasana or the right angle pose. This pose is great when it comes
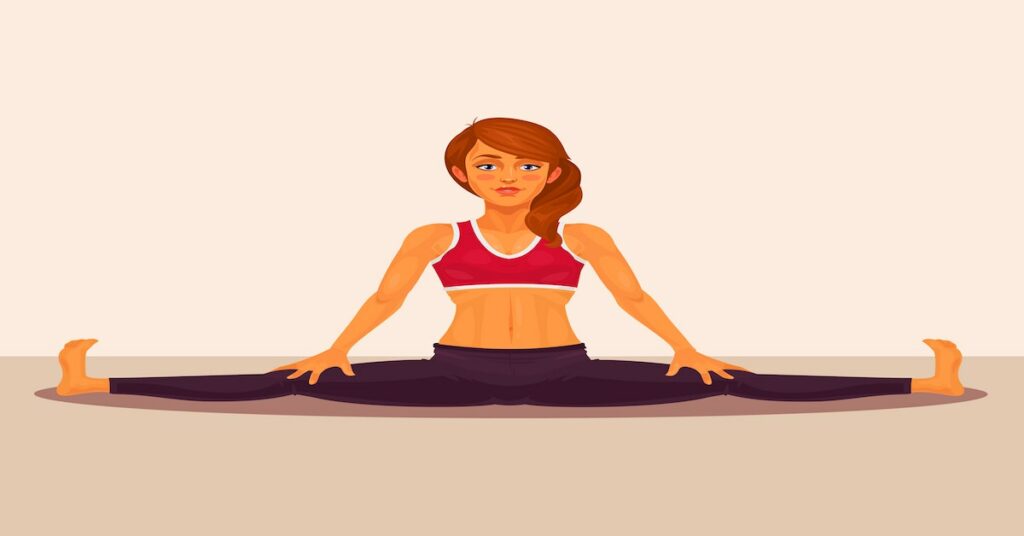
to flexibility in your leg joints, ankle, back, lower back, etc. Along with your back, it is a great posture for your hamstring, hip bones, and the side hip bones. Along with stretching out your most tense muscles, it will provide you with a good productive state of mind throughout the day. This asana surely requires a little bit of patience and effort but is a great practice when considered in the long run for your physical as well as mental health. With the busy days and stuffed schedule we usually don’t realize the importance of stretching out our bodies and releasing the tension from the same. Samakonasana is a simple asana which requires least effort when practiced religiously and maximum benefit. Importance of Samakonasana in Daily Life It is a great posture for a daily dose of revitalization and rejuvenation. Along with stretching out your muscles, it helps to make them more flexible which in turn improves the workability of your muscles. Helps in increasing the blood circulation in the lower abdomen is usually not an area we give much attention to but holds an important aspect. It helps in providing good stability along with improving your psychological health. Step-by-Step Guide Sit on a hard surface with your back straight. The surface should be firm enough to support you and hold your posture when you will split your legs. Sit with both your legs straight and start to breathe in and out slowly. Breathing in and out will help to relax your muscles and will help your body to go into more intense positions. Slowly, start to separate your legs towards either side. Don’t stretch beyond your capacity. Split your legs till they are perfectly straight on either side and keep breathing in and out while holding the posture. Repeat this process a few times. Benefits of Samakonasana Inner thigh muscles or hamstring are stimulated through this pose, which helps in toning your inner thigh as well. Very effective in reducing pain in the hip joints as it stretches your hip muscles, groin, etc. Very good posture for the children in their growing age as it provides good flexibility and stretches your body to its optimum. Blood circulation is increased in your lower belly is improved. A very good posture for better functioning of your lower abdomen which in turn helps in better digestion. Very useful pose in the strengthening of your hip joints, lower back joints, etc. People suffering from neck pain can practice this asana regularly for relief. This pose helps relief from stress and provides good mental health. It helps to give a nice boost of hormones to the body. Samakonasana Precautions This asana should be practiced with an empty stomach or 5-6 hours after you have taken your meal. People with severe back pain or injury should avoid this asana. People with leg problems should practice this asana under professional guidance. Contraindications In case of any severe injury or surgery, you should let your instructor know about the problem and should practice this asana only under professional guidance. People having a slip disc problem should avoid this posture. Pregnant women should particularly avoid this posture. Conclusion To sum it all up, Samakonasana is a typical posture but can be mastered with regular practice and patience. Make sure you are not exceeding your capacity while stretching your legs. There are several benefits to this single posture which makes this asana unique. It is a great posture for daily stress-relieving and gaining a balanced spectrum. It can be easily performed in the comfort of your house but will require a bit of professional guidance especially when you are a beginner. There is plenty of matter and guidance available on the internet regarding this posture in the form of articles or videos. (adsbygoogle = window.adsbygoogle || []).push({});
Read More...
Read Less...
Savasana (Corpse Pose): Benefits and Precautions
by Rishikesh Yogis
https://www.rishikeshyogisyogshala.org/savasana-corpse-pose-benefits-and-precautions/
Savasana is a pose that is used to rejuvenate or relax your body at the end of yoga sessions.
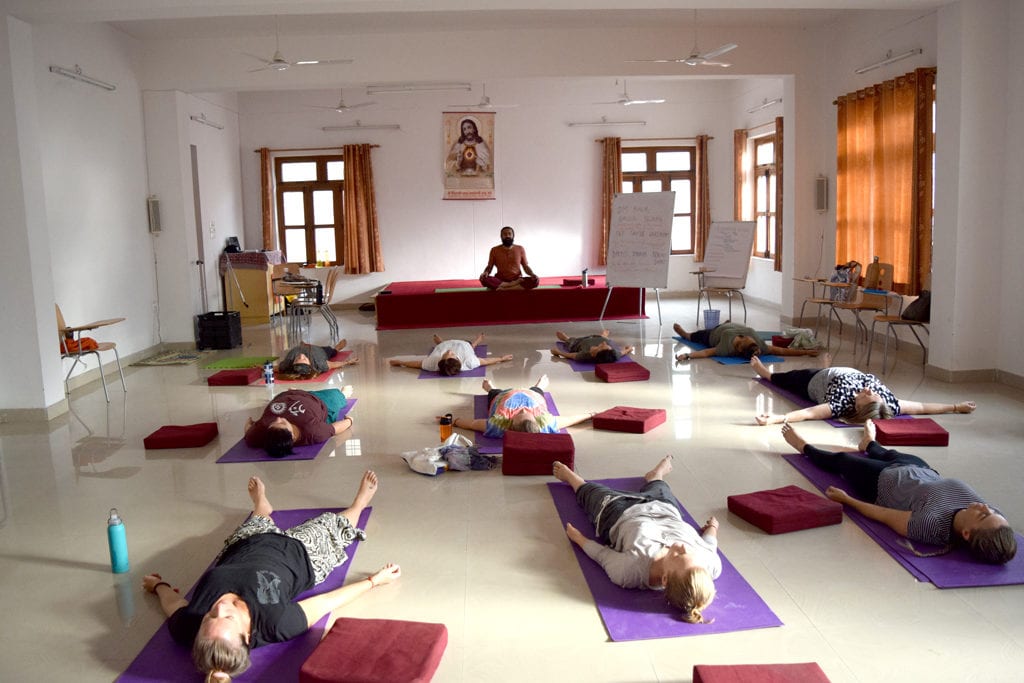
Savasana is a Sanskrit word where sava means ‘corpse’ and asana is denoted to a ‘posture’ or ‘pose’. Though savasana is usually practiced at the end of yoga sessions to provide a complete sense of freshness to the body, it can also be practiced in the beginning or middle of the sessions to provide a better start or break. This pose is also known to revamp root chakra, Muladhara and helps us to be more stable and secure in life. To practice this pose, you have to lie down facing up with your hands on either side, relaxed. Place your legs a little apart from each other along with eyes shut and proceed with taking a long and deep breath. This pose is not only important for relaxing the body but gives you an actual sense of freshness and freedom just as the name says, savasana. Why Savasana is Hard to Perform Savasana or corpse pose might look very easy to perform but is not. People with great flexibility and good performance in yoga class finds it a lot harder to lie down and relax the body than to perform critical poses. It is never easy to tell your brain to relax, just like that. There are several researches out there supporting the fact of how difficult it has become to rest your body when your state of mind is constantly stuck in the hustle of life. Therefore, Savasana is a bliss that prepares your body to gradually adapt to the good and benefits of the poses and postures provided by yoga and help your body and mind to relax. Initially, it might look and feel difficult to just lie there and try to relax. Many of the times you will start feeling drowsy and sleepy while performing the pose. “Savasana is being aware of your surroundings, your state of mind while being completely relaxed.” Importance of Savasana in Daily Life Practicing yoga can change the way to proceed and dwell your life and to maintain that sacred relationship between you and yoga, savasana is performed before you enter the hustle of your life. Yoga is a practice that helps you to perform different breathing activities by putting pressure on your nervous system. Practicing to put pressure on your body in a hypothetical situation such as performing a normal activity will help you in real life to go through different situations in a very calm manner. Savasana helps you absorb the qualities provided by yoga in a very subtle manner before entering in the real, usual world. Step-by-Step Guide: How to Perform Savasana Pose Lie down on your back on a hard surface without any cushion or pillow, preferably floor. Close your eyes and place your hands a little far from your stomach with the palm facing up. Part your legs with a little distance between the two and feet relaxed so that they are making a 45-degree angle. Stay conscious of your surroundings but don’t get too distracted. Start breathing in and out involving all of your senses. Since the whole purpose is to rejuvenate, you don’t have to put much pressure on any part of the body. Repeat the breathing process for a couple of minutes after, before or in the middle of your yoga session to take a break and refresh. After completing the practice, slowly start to open your eyes and come back in your normal position. Now while performing Savasana you have to focus on your state of mind since the whole point of this practice is to increase concentration. Benefits of Savasana Pose Savasana helps reduce blood pressure by infusing more fresh air in your arteries and hence increasing the circulation pattern. Help reduce muscle tension extensively as you have to leave your body as relaxed as possible while performing this posture or asana. Helpful in decreasing anxiety levels by stimulating the root chakra, Muladhara and helping us in being more calm and grounded. “It is quite easy to get caught in the undesirable situations that life throws at you but dwelling on them can cause you to suffer from anxiety, stress, etc. Savasana helps you to relax and stay calm in such situations and proceed with a clear state of mind.” Increases productivity and energy levels by helping us attain a good state of mind. “Everyone is running behind being more productive and hustle more but nobody is putting much concern towards why there is a need to be more productive. Your body is naturally more productive when you are focused and clear in actions you perform and Savasana helps you build the foundation for such concentration.” it Improves focus, concentration, and memory. Savasana Pose Precautions Avoid moving your body while performing Savasana as it might disturb the practice and will fuel your distractions. Make sure to perform it on a hard, flat surface. Practice this in an environment that offers quiet and relaxing surroundings. Contraindications People with back pain should perform this practice with a pillow or cushion support under their knees. Your body should be warm while performing this practice. Try to practice it in a dark place or while covering your eyes as light may fuel as a distraction as well. People with neck pain should take the support of a pillow or cushion under their neck. Conclusion Savasana is not only the need of the body but the need of the hour too. We all tend to get too busy in our daily lives trying to be a better version of ourselves that we forget to take a break and rejuvenate. Our bodies tend to develop stress and results can be quite severe in extreme cases such as suffering from anxiety attacks or getting severely ill. Savasana is a simple solution to all the stress that we humans built inside our bodies. You don’t need to be an expert while doing this and can comfortably perform this practice in your house without any hustle. (adsbygoogle = window.adsbygoogle || []).push({});
Read More...
Read Less...
Improve Your Whole Well-being with Sarvangasana
by Rishikesh Yogis
https://www.rishikeshyogisyogshala.org/improve-whole-well-sarvangasana/
Waking up early in the morning, getting ready for the office, draining your mind and body
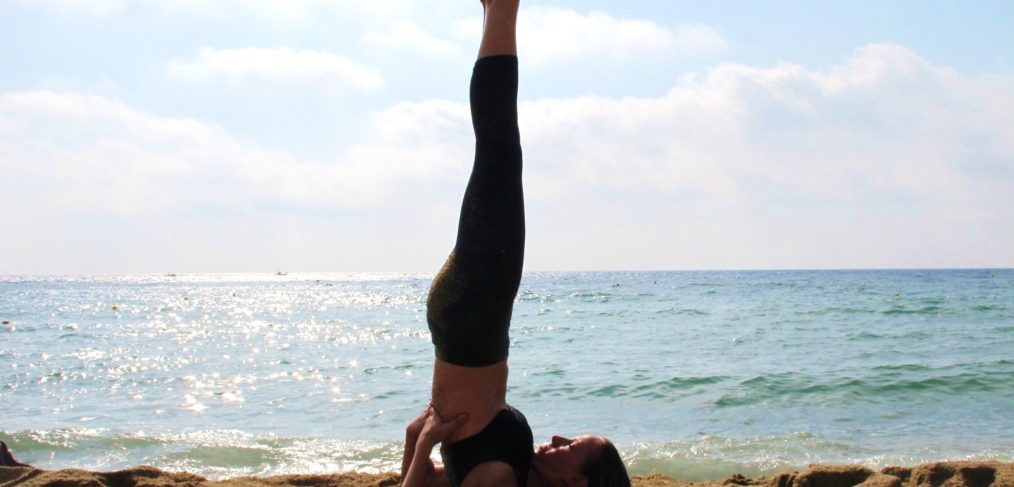
’ s energy at the workplace for the whole day, coming home, performing rest of the essential works! To exist and to survive in the competitive world of today is a tough row to hoe. To match with the fast-paced lifestyle, we should be fit and fine at all levels. But our tightly-packed schedule doesn’t allow us to manage quality time just for ‘us’. If you aren’t a gym person and looking for an effective yet natural solution to regulate your entire system, then all you need to do is practice Sarvangasana. Derived its name from three Sanskrit words, ‘Sarva’ means all, ‘ang’ means part of the body and ‘asana’ means posture, Sarvangasana refers to the pose engaging the entire body. It is considered as one of the best postures in Hatha yoga and even popular as ‘the mother of all yoga sequences’ because of the amazing benefits it offers. As it is about uplifting the whole body in the air with the support of the shoulders and hands, it is also known as the shoulder stand pose. It is an advanced stage of yogic practice. The pose covers the entire body from toes to fingertips and protects the practitioner from a number of ailments at all levels. Practising Sarvangasana pose on a regular basis, a person feels new vigour and strength and becomes joyous and confident. How to get into the pose: Lie on the back. Join the legs and place your hands sideways close to your body. Keep palms flat on the floor. With the help of palms, uplift both the legs in the air straight at 90-degree angle. Now, raise your back and the hips in upward direction with the support of your hands. Support your back with the hands and keep your whole body in a straight line. Let your chin touch the chest. Put the whole body weight on the shoulders, without pressurizing the head or the neck. If you feel any stress in the neck, come back to normal state. Keep your legs firm and feet straight over the nose. Remain in this posture for 30-60 seconds and breathe gently. To come back in the initial state, first lower the knees to the forehead, hands to the floor and then lower the whole body. Repeat for 2-3 times. Tips to follow before commencing the practice: The shoulder stand pose should always be performed under the expert guidance. Consult with your doctor before attempting it. People with eye problems, blood pressure, cardiovascular or thyroid diseases should avoid it. The pose should be avoided during pregnancy period. Prepare yourself for the pose by doing a few other yoga sequences to open up your muscles. Tadasana, neck or simple lower back exercise can be done before getting into this pose. In the presence of any strain or stress in the neck, avoid performing it. It may result in a severe neck injury. Always give enough support from your hands to the back. Never take support from the head or neck. Perform this pose slowly and carefully. Do not leave the posture with a jerk and get up immediately. Follow with Corpse pose or Fish posture. The shoulder stand pose can be done twice a day. In the beginning, perform it for 2 minutes and, later expand the duration to almost 30 minutes. Benefits of Sarvangasana Pose: The pose helps improve overall health. It enhances blood circulation within the body. It improves the functioning of the digestive system. It strengthens the back and cures back problems. It is beneficial for people with sexual disorders. It improves the function of sex organ and increases their efficiency. It increases the resistance power of the body. It improves the reproductive functions in both men and women. It helps in weight loss. It balances the blood sugar level in the body and cures improper functioning of the pancreas. It is beneficial for people suffering from sleep disorder and promotes deep relaxing sleep. It cures thyroid problems. It is beneficial for people suffering from headache or a migraine. It improves the function of ovaries. Regular practice of Sarvangasana makes your skin glow and removes dark circles. It is amazingly helpful for people suffering from high blood pressure, short temper, nervous breakdown and irritation. The pose cures constipation by regulating free movement of the bowel. It enhances blood supply in the head region and prevents hair fall. The pose helps cure stomach ulcers, intestinal ulcers, chronic pains in the abdominal region and colitis. So, start practicing Sarvangasana on a regular basis to regulate your entire body.
Read More...
Read Less...
10 Easy-to-do Yoga Poses to Achieve a Flexible Body
by Rishikesh Yogis
https://www.rishikeshyogisyogshala.org/10-easy-yoga-poses-achieve-flexible-body/
Looking at flexible people moving their bodies all around with ease and grace, you often
wish to become as flexible as them. When you try to do the same, you end up feeling feel stiff, achy, and immobile. Don’t get disappointed, the good news is you can still improve your flexibility without undergoing any treatment or spending hours in the gym. Yes, it is possible with regular practice of Yoga. Yoga is undebatably the most effective solution for achieving flexibility. Regular practice of yoga helps the body become more flexible by lengthening and strengthening the muscles of the entire body in a safe and effective way. It provides remarkable flexibility in all parts even those which have not been worked upon. Here is a list of some of the best and simple yoga postures that help achieve a flexible and supple body. Take a glance: Balasana or Child’s Pose: Sit on your heels on the mat. Keep your knee either together or apart. Now, slowly bend forward and lower your forehead to touch the floor. Place your arms alongside the body or reach out the arms towards the top of the yoga mat, palms facing down. Now, gently press your chest on the thighs. Hold the posture for 1 minute. Standing Forward Bend Pose or Uttanasana: Stand straight in Tadasana or Mountain pose with feet hip-width apart. Inhale, lengthen the spine and place the hands on your hips. Now, hinge your hips to bend forward and reach out the arms towards the floor. Bend your knees in order to avoid any strain in the lower back. Let the arms and the crown of your head hang down. Press your heels into the floor and lift your sit bones towards the ceiling. Touch the floor with fingertips Hold the posture for a few breaths. Savasana or Corpse Pose: Lie down on your back. Extend your legs straight and keep them separated. Place the arms alongside the body. Now, close the eyes and relax your mind and body. Stay in this pose for 3-5 minutes and breathe deeply at a steady rate. Setu Bandhasana or Bridge Pose: Lie on your back and keep the arms sideways with palms facing down. Bend your knees and fold the legs. Ensure your ankles and knees are aligned and, feet are a few inches apart from each other. Press the palms into the floor and raise your entire back off the floor slowly. Once balanced, hold the posture for a few deep breaths. Keep your thighs parallel to each other and let your chest touch the chin. Adho Mukha Svanasana or Downward Facing Dog Pose: Begin on your hands and knees in a table-top position. Keep your knees and elbows straight. Now pull your belly in and push your hips upwards in a way that the body forms an inverted ‘V’ pose. Keep your hands shoulder-distance apart and knees hip-width apart on the floor. Press the palms into the floor and lengthen your neck. Look straight and breathe deeply. Hold the posture for 1-3 minutes. Warrior Pose II or Virabhadrasana II: Stand straight with legs hip-distance apart and arms on the sides. Now, spread the legs wide apart. Turn the right leg by 90 degrees to the right side. Turn the other feet inwards by 45 degrees. Do not twist the body. Stretch the hands sideways at shoulder height, palms facing up. Now, bend the right knee and turn your head to the right side while exhaling. Push your pelvis and keep going down while breathing. Repeat on the other side. Standing Forward Bend or Padahastasana: Stand straight in Tadasana Pose. Inhale deeply and lift your hands up over the head. Exhale, bend the body forward with straight palms and try to touch the floor. Do not bend the knees. Hold the breath, tuck your tummy in and remain in the posture for about 60-90 seconds. Locust Pose or Shalabhasana: Lie down on your belly on the floor. Keep your hands below the thighs. Allow your chin and forehead to rest on the floor. Now, raise your one leg off the floor about 10 inches without bending the knee. Repeat the same with the other leg as well. Also, try to lift up both the legs together without bending the knee. Viparita Karani or Legs up the Wall pose: Lie down on the floor near a wall and breathe deeply at a steady rate. While exhaling, swing your both legs against the wall in a way that your heels and sitting bones are supported onto the wall. Push your body slightly back from the wall in case you feel any discomfort in the lower back. Place your arms on the floor at shoulder height with palms facing up. Keep the spine straight and let your head rest on the floor. Close your eyes and relax in this posture for a few minutes. Tadasana or Mountain Pose: Stand straight with legs slightly apart. Let your hands hang alongside the body. Lift your ankles, kneecaps, thighs and abdomen upward and look slightly up. Relax the shoulders. Now, inhale and raise your heels, chest, shoulders and arms slightly upwards, putting the whole weight on the toes. Breathe deeply 5-6 times and feel the stretch in the entire body. So, get started with these yoga poses and begin your journey on the road to flexibility.
Read More...
Read Less...
5 Yoga Techniques for a Happier Life
by Rishikesh Yogis
https://www.rishikeshyogisyogshala.org/5-yoga-techniques-happier-life/
Full of ups and downs, struggles and tussles, complications and confusions….Life isn’t so easy,
right? Suffering, failure, pain, loneliness, sorrow, disappointment, a lot of curveballs come along the journey of life. Financial loss, heart breaks, losing people close to us, job firing and so many more number of unpredictable things may happen , that could make us feel crabby, lost and clueless. Nothing lasts forever, neither happiness nor sorrow. Now if you wonder if there is any mantra to stay happy at the core, to be internally calm and content ? Yes..it is possible! There is a natural drug that will make you feel happy, cheerful, and bright right from the moment you are awake and that is- Yoga! It is one of the most effective artforms that lifts the spirit, elevates the mood, and leaves you with a smile on the face. Happiness is not something that can be gained from an external source and stored within forever; rather it comes from within. By cultivating innate joy, yoga encourages a person to blossom into every aspect of life. The hard life imprisons us and confines us in the boundaries of responsibilities. Yoga is a sacred adventure that allows us to be carefree and provides a sense of joy and freedom. The practice of physical exercises combined with breathing techniques brings too many mental and physical benefits. From curing physical ailments like chronic pain, cardiovascular diseases, asthma, lymphoma to mental health problems such as insomnia, fatigue, depression, anxiety, stress, schizophrenia and more, yoga techniques offer numerous benefits. Also, when it becomes a part of the lifestyle, it transforms your personality by increasing positivity, self-esteem, contentment and reducing negativities in life. Whether you are down after a betrayal, need the motivation to leap out of bed to head for the workplace or just feeling a little low emotionally, yoga can help you get back on the right track. With yoga techniques, you can find the lost charm and happiness in life. Here are some playful yoga techniques that help beat the blues and create a happy you: Cat-Cow Pose: Come on your hands and knees in a table-top position. Ensure your knees are under the hips and palms under the shoulders. Inhale and lift your tailbone and chest upward and bring the belly towards the floor. Turn your gaze towards the sky. Exhale and come back to the starting state. Repeat for 5-10 times. Camel Pose: Kneel on the mat. Keep feet flat on the floor. Put your pelvis on the knees, lower down your tailbone and lift your belly. Put your hands on the hips. Open your chest by leaning back. Grab your heels. Relax for a couple of breaths. Slowly come back to the original state. Warrior Pose II: Stand with your feet parallel to each other and one leg-length apart. Turn your right foot 90 degree and left one slightly, so that left heel is in a straight line with the arch of right foot. Bring down your left thigh to the floor. Put the torso over the pelvis. Spread your arms parallel to the floor and gaze at your fingertips. Repeat on the other side. Goddess Pose: Stand on the feet with one leg’s distance. Keep them parallel to each other. Bring your heels in and toes out and ensure that your knees are in the same direction as your toes. Lower your pelvis into a neutral position and bend your knees. Lift your arms at shoulder height with elbows slightly bent and palms in the upward direction. Simple Spinal Twist Pose: Lie on the back and bring both the knees to the chest. Drop both the knees to the right side and open your arms widely. Elongate your lower back and bring down the left shoulder. Turn your head to the left slightly. Repeat on the other side. Reclined Bound Angle Pose: Start on the back, bend your knees wide and keep the soles of the feet together. Bring your heels close to your pelvis as much as you can. Lengthen your neck by drawing the shoulder blades a little down. Lift your chest and spread your arms wide with palms facing the sky. Life is too short. Don’t wait, enjoy every day to its fullest with the wonderful yoga techniques!
Read More...
Read Less...
10 Powerful Yoga Poses for Glowing Skin
by Rishikesh Yogis
https://www.rishikeshyogisyogshala.org/10-powerful-yoga-poses-glowing-skin/
Beautiful, supple, glowing skin is what every person desires. From trying expensive beauty
products and undergoing skin treatments to spending a lot of time and hard-earned money in salons and parlours, we leave no stones unturned to look gorgeous and beautiful. But we all know, this isn’t enough. External makeup and remedies can’t provide sustaining beauty. After giving a shot to every method you came across, the beautiful glow still seems out of reach. But, the good news is that it is not a far-fetched dream and, is actually quite simple. To look good on the outside, not necessarily you need harsh chemicals and expensive treatments, instead, you must be healthy and well from the inside. To make it possible, try a natural and inexpensive method. Roll out the mat and start practising yoga. With numerous benefits at physical, mental, and spiritual level, Yoga is also known to work on your skin like no commercial product can. All you need to do is take out a few minutes from your busy daily schedule to practice yoga and get amazing results with zero investment. Let’s first explore the reasons that restrain us from a healthy and glowing skin. Let’s explore where skin problems such as wrinkles and pimples stem from. The common causes of most of the skin problems are: Stress and unhealthy lifestyle practices. Unhealthy activities like smoking, consuming alcohol, drug addiction, and more. Unhealthy and unhygienic food. Hormonal imbalances in the body. Improper digestion. Take a look at the below-mentioned yoga poses for glowing skin on your face: Sarvangasana: Also known as the shoulder stand pose, Sarvangasana is one of the most effective yoga asanas for glowing skin. It increases blood circulation towards the face, thereby improving its texture and quality. Practice this posture 3- 5 times a day and get rid of pimples, acnes, wrinkles, dullness and more. Halasana: One of the best yoga postures for beautiful and glowing skin, it is also known as the Plough pose. This asana improves the digestive process that results in a glowing and healthy skin. Uttanasana: The forward-bending pose helps increase blood circulation in the face region making it one of the most beneficial yoga poses for glowing skin. Along with increasing oxygen supply to the skin cells, the pose supplies helpful nutrients also that rejuvenate the skin by fighting against the damage caused by free radicals. Bharadvaja’s twist: A good digestive system is a must for attaining a healthy and beautiful skin. Known as the seated twist pose, it removes toxins and other harmful substances from the various organs of the body resulting in a healthy skin. Matsyasana: The fish pose is very beneficial for various skin problems. It balances the hormones in the body and improves the functions of the thyroid, pineal, and pituitary glands that lead to a healthy and glowing skin. It also helps in getting rid of double chin problem by giving a good stretch to the facial muscles of the face and throat. Trikonasana: Popular as the Triangle pose, it is indeed the best yoga posture for achieving a smooth and glowing skin. The pose opens up the lungs, chest, and heart. It refreshes and rejuvenates the skin by supplying more oxygen to the skin. Bhujangasana: The cobra pose is one of the most relaxing yoga poses that help reduces fatigue, tension, stress, and tiredness. It helps the body flush out accumulated toxins and pollutants from the system. It supplies more oxygen to the skin cells while rejuvenating it. Ustrasana: The pose involves intense back bend that leads to opening of the rib cage. Known as the camel pose, it increases lung capacity for inhaling more oxygen. This pose helps in getting rid of pimples and acnes by reducing stress and improving hormonal balance in the body. Pavanamuktasana: The wind relieving pose is very beneficial for improving digestion and curing constipation which is one of the factors responsible for acne and pimples outbursts on the face. Tadasana: Popular as the Mountain Pose, this simple standing pose enhances deep and rhythmic breathing that is an essential factor for a healthy skin. The pose promotes controlled breathing that helps in inhaling more oxygen and helps the body release harmful toxins leaving the skin beautiful and glowing. So, start practicing these yoga poses on a regular basis to get a picture perfect glow on the face.
Read More...
Read Less...
7 Ultimate Yoga Poses for Stress Management
by Rishikesh Yogis
https://www.rishikeshyogisyogshala.org/7-ultimate-yoga-poses-stress-management/
“Perhaps! Stress is the alternate definition of Life~” How many of us have undergone this
persisting emotion and submitted to life’s agony? Better yet, how many of us have ‘not’ felt this emotion at any point in our lives? Probably, not many of us are deprived of this ‘gruesome’ statement. Being hit by stress is a normal occurrence in today’s tumultuous scenario. It can attack anybody, anytime and anywhere. It is best to be avoided. However, it is not ‘unavoidable’ at all times either. The key is to manage it, keep this ‘stress’ under the influence of our body, mind and soul, rather than letting it influence us. Yoga – the greatest science ever developed with a mission directed towards holistic wellbeing of the mind, body and soul. This divine art form offers the perfect solution, both ergonomic and completely harmless – for an endless number of ailments and problems like stress, coronary disorders, body aches, etc. Hence, if you are victim of this stress too then it is time to strap up and feel better again by practicing some yoga for stress management. Yoga is a cornerstone of various poses and breathing techniques that are highly beneficial in providing instant relief from any kind of strain you might be undergoing. And so, let us discuss the seven most amazing yoga poses for managing stress that can be practiced at all levels anywhere with ease: Sukhasana (Easy Pose) Start with Sukhasana, or the Easy Pose. As the name suggests, it is one of the easiest and completely revitalizing poses in yoga. The pose does not just calm you down, it also opens your hip muscles and strengthens your spine while relaxing the back muscles. Concentrate for up to a minute on your breath while sitting in this pose with a straight spine. Garudasana (Eagle Pose) The next pose you can undertake is Garudasana, also known as the Eagle pose. This yoga asana exercises the ability of a human mind to focus on a single point, akin to the sharp eyed focus of an eagle. The focal point could be anything — an object that makes you feel pleasant and happy. This yoga pose is excellent for relieving stress in shoulders and hips – two of the most common stress points. Vajrasana (Thunderbolt Pose) Variation When stress attacks a body and is carried in it persistently, it begins to affect its internal organs, like heart, stomach, etc. This is the ideal yoga posture for managing higher levels of stress. The pose calms the body and mind while it also improves its digestive system. Perform it during bedtime for a good night’s sleep. Supta Baddha Konasana (Reclined Bound Angle Pose) This is a ‘magic’ yoga posture for the entire body and mind. Just try it and you would know that we are not kidding here. This awesome yoga pose helps relax groin area, inner thighs and hips muscles as well. In other words, it opens all those major spots in the body where you primarily hold stress. For a much enhanced effect on the mind, you can remain in this pose while playing a nice soothing music or murmuring soothing messages. Viparita Karani (Leg up the wall pose) Viparita Karani is a widely unique yoga pose for relieving stress and anxiety from the brain and the entire body. This pose is carried out with legs straight up the wall while rest of the body remains in perpendicular position on the ground. This pose regulates blood flow in the entire body and directs it from your feet to the brain. The pose builds your ability to concentrate on breathing movement and relaxes your heart muscle as it does not have to pump blood into the lower body. Marjaryasana (Cat Pose) This pose is highly effective for women undergoing menstrual discomfort. It helps relieve stress in the spine and abdomen as well. This is also an excellent yoga asana for eliminating stomach disorders. For best results, combine this pose with Cow Pose or Bitilasana. Savasana (Corpse Pose) The last one, but definitely not the least, Shavasana or the Corpse Pose is the perfect ending yoga asana for relieving stress. One of the most rejuvenating and calming postures, a yoga session remains incomplete if this pose is not practiced. This pose is highly crucial for complete restoration of the body, mind and soul. It is also beneficial for promoting deeper sleep, improving cardiac muscles and for relieving the entire nervous system. Remain in this pose for 10-20 minutes at the end of your yoga session for an absolutely stress-free body. So, the next time you feel stressed – grab some quiet space and get on with some yoga. Reward yourself a rehabilitated spirit.
Read More...
Read Less...
Video
Events
Recent Posts
Rishikesh Yoga institute
Rishikesh Yoga Teacher Training Course.
Rishikesh Yoga Certification
Yoga Teacher Certification Rishikesh
200 Hour Yoga Teacher Training Rishikesh
Yoga Teacher Training Rishikesh for 200 hour
What is the Role of yoga in preventing lifestyle diseases
What is the importance of yoga in our life
5 Amazing Benefits Of Meditation You Should Know About
What to Pack for Your Yoga Teacher Training in Rishikesh
Enroll Now